The "View" in Chaoscope is simply the project window, where you can manipulate the attractor in real-time and where the render is displayed.
4.3.1 The different view states
There are six different view states, which indicate what task Chaoscope is busy completing and which actions are available. The View state is displayed in the View window title bar, after the Attractor type, within brackets.
Searching- changed the attractor type
- changed the rendering mode
- changed one or both gradients in Light or Plasma modes
- randomized the lights in Solid mode
- changed the attractor angle, position or scale. (see 4.3.2 and 4.3.4)
- loaded a project file
Many actions will make the view switch back to preview mode. The preview replaces the last render, so make sure you have saved the image before modifying the view. A good way to avoid switching back to preview mode by accident is to select the Zoom tool before the render.
Rendering or Searching is completed.
4.3.2 View interface
Once you have found an attractor you wish to render, you may want to change the point of view, or zoom in onto a particular feature. To do so, first bring the mouse cursor onto the view. You can then apply the following adjustments:
Rotation4.3.3 View Toolbar
There are currently two enabled tools on the View toolbar:
- Default: Used as described in 4.3.2.
- Zoom: Used to zoom in and out. Zoom out by holding the Alt key.
the View toolbar
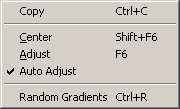
4.3.4 View menu

the View menu
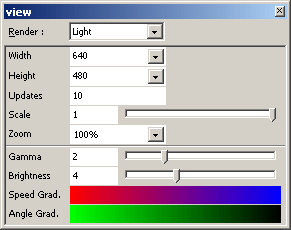
4.3.5 View property palette
In this palette, the changes made to some of the properties will not be applied immediately. You will know if a change needs to be applied when the property caption is displayed in bold characters. Press Return to apply the changes or Escape to cancel them.
Render drop-down list lets you change the rendering mode on the fly.
Width and Height drop-down lists change the image size. You can select a predefined value or type your own (press Return to apply the change)
Updates is the number of times the view will be updated while rendering an attractor. You may change to "1" when you are ready to start the final rendering of an attractor.

the View property palette
Scale is the size of the attractor.
Zoom is the view zoom level. Do not confuse Scale and Zoom! Scale is the scale (or size) of the attractor and changing it affects the final render. Zoom is the size factor applied to the image and doesn't affect the final render.
Below are the parameters specific to the Render mode, as discussed in Rendering modes.
- Open opens a new gradient, current a FractINT compatible .map file. You can also double-click on a gradient to open a new one.
- Random picks a new gradient at random.
- Reverse reverses the colors order within the gradient.

the gradient context menu

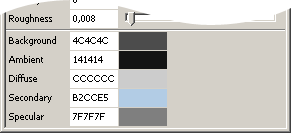
color properties in Solid mode